Executive Summary
In California, replastering a pool typically takes 5–10 days from drain to refill, with most of the variability driven by discharge compliance, surface condition, finish selection, and curing/startup requirements. To answer how long does it take to replaster a pool in practical terms, plan for 1–3 days of chip-out/prep, about 1 day for repairs and bond work, 1 day for finish application, plus 2–4 days for fill and startup before it’s generally swim-ready.
3 Core Insights
- Discharge logistics set the true start date: Sewer discharge permits, dechlorination requirements, cleanout access, or scheduling a water-truck haul-off can add 1–2 days before chip-out begins.
- Prep quality controls both duration and durability: Demolition and surface prep usually take 1–3 days but extend when there’s delamination, multiple layers, or hard-water scale that may require an extra removal/acid-wash step.
- Startup governs “swim-ready,” not just refill: Even after plaster day, the pool typically needs 2–4 days of continuous fill, brushing, and chemistry balancing—often longer where fill water is high-calcium—to protect the new finish.
Replastering a pool in California typically takes 5 to 10 days from drain to refill, with extra time added for inspections, specialty finishes, or weather delays. Homeowners asking how long does it take to replaster a pool should plan for 1 to 3 days of demolition and surface prep, 1 day for bond coat and tile or fitting resets, and 1 day to apply plaster, pebble, or quartz. Curing and startup usually require 2 to 4 additional days of controlled filling, brushing, and water chemistry balancing. In Los Angeles County and Orange County, a required sewer discharge permit or a scheduled water-truck haul-off can add 1 to 2 days before any chip-out begins. In the Inland Empire, hard water and high calcium often mean an added acid wash step after prep, which can extend the schedule by a day. Coastal zones like San Diego frequently see morning marine layer and higher humidity, which can slow plaster set times and push finishing work into the next day. Cold winter nights in the Central Valley can also delay application if temperatures fall near the minimum range for plaster curing, forcing crews to adjust start times and extend the timeline.
What drives the replastering timeline in California
Pool replaster schedules are controlled by permitting/discharge rules, substrate condition, finish type, and curing/startup requirements. If any of those inputs change, the “drain-to-refill” window shifts immediately—even when crew size stays the same.
In practical terms, the biggest timeline variables are:
- Water removal method and approvals (sewer cleanout discharge vs. pumping to street vs. haul-off), which must follow local agency rules.
- Extent of chip-out (full removal to gunite/shotcrete vs. partial delamination repair).
- Bonding approach (bond coat vs. additional crack treatment and patching).
- Finish selection (standard white plaster vs. quartz vs. pebble; each has different placement and finishing demands).
- Weather and curing conditions (cold nights, humidity/marine layer, and wind affect set times and scheduling).
- Startup discipline (brushing frequency and chemistry targets affect how soon the pool is “swim ready,” even if it is full).
Typical replaster workflow and day-by-day sequence
Most California replaster projects follow a repeatable order: drain and prep, remove failed material, repair and bond, apply finish, then fill and start up. When all steps are coordinated, the project commonly lands in a 5–10 day window.
A standard workflow looks like this:
- Drain planning and discharge compliance (permit/approval if required, set pump/filtration bypass plan).
- Drain and safety set-up (hydrostatic relief considerations, equipment protection, access control).
- Demolition (“chip-out”) and removal to sound substrate.
- Surface prep (pressure wash, grind, edge detail, remove scale/contaminants).
- Shell repairs (crack treatment, hollow spots, bond beam fixes as needed).
- Waterline tile/coping/fitting resets where required.
- Bond coat application immediately before the finish coat where specified.
- Plaster/quartz/pebble installation and finishing.
- Continuous fill and controlled startup (brushing + chemistry management).
Drain and discharge: the step that can add days before work starts
Drain logistics are often the first schedule bottleneck because many municipalities restrict where pool water can go. In Southern California, some cities require a sewer cleanout discharge method and may require a permit or specific conditions before releasing water.
Common compliant approaches used in California metros include:
- Sanitary sewer discharge via a sewer cleanout (frequently subject to local sewer agency rules, including dechlorination requirements and limits on flow rate).
- Haul-off by water truck when discharge is restricted, when the pool is heavily contaminated, or when site conditions limit access to a cleanout.
- On-site retention/landscape dispersal only where allowed and only if it will not cause runoff to storm drains (storm drain discharge is commonly prohibited by local stormwater programs).
Schedule impacts to plan for:
- 1–2 days can be added if a sewer discharge permit must be pulled, if access to the cleanout must be created, or if a water-truck pickup must be booked.
- Same-day delays occur when dechlorination (and verification) is required and not prepared in advance.
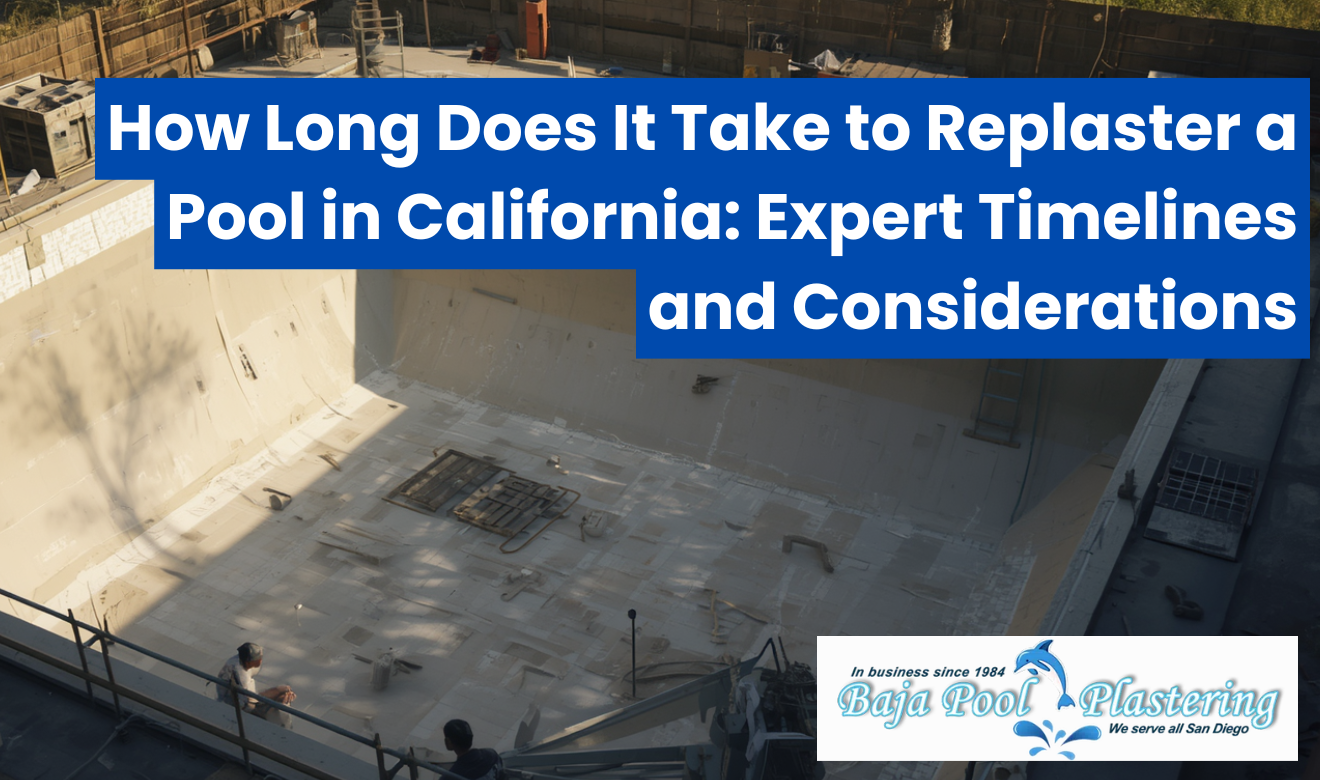
Demolition and surface preparation (usually 1–3 days)
Chip-out and prep determine how well the new finish bonds and how long it lasts. This phase takes the longest when the existing plaster is delaminated, heavily scaled, or has multiple prior layers.
Key tasks that dictate duration:
- Sounding and marking hollow/delaminated areas.
- Full chip-out vs. selective removal based on adhesion and thickness of existing material.
- Detail work at steps, benches, and coves where failures commonly hide.
- Bond beam and tile line prep to eliminate weak edges that can crack later.
- Mechanical cleaning (pressure washing and/or grinding) to remove laitance, scale, and contaminants.
When Inland Empire-style hard water scaling is present, crews often add an additional removal step to eliminate calcium buildup before bonding. If an acid wash is used, it must be controlled and neutralized appropriately, and it can extend the project by about a day because it changes the sequencing of prep, drying, and inspection of the shell.
Shell repairs, bond coat, and resets (usually 1 day)
After the shell is exposed and clean, the crew completes repairs and applies a bonding system suited to the chosen finish. This is the phase where “hidden” issues—cracks, failed fittings, or tile problems—can add time.
Common repair and reset items include:
- Crack treatment (routing, cleaning, and patching with appropriate cementitious or epoxy systems depending on location and movement risk).
- Replacing or re-bedding fittings (returns, lights, main drain covers) so the new interior finish seals correctly.
- Waterline tile resets where tile is loose or the bond beam edge is compromised.
- Bond coat applied immediately before the finish (timed so it remains within the manufacturer’s working window).
If you’re coordinating broader work such as leak correction or plumbing updates at the same time, bundling it under a single mobilization can reduce overall downtime. For projects that include broader fixes beyond the interior surface, schedule coordination with a pool repair scope can prevent rework and keep the plaster day from slipping.
Plaster, quartz, or pebble application (typically 1 day, sometimes 2)
The installation day is fast but unforgiving: placement, troweling, and finishing must happen within strict material set windows. Specialty aggregates and complex shapes can push finishing into a second day if conditions slow the set.
What happens on “plaster day”:
- Final checks (clean shell, no standing water, correct bond coat timing).
- Mixing and pumping to apply the interior finish evenly.
- Hand troweling to achieve the specified texture and densification.
- Detail finishing around fittings, corners, steps, and benches.
Regional timing realities in California:
- Coastal San Diego: morning marine layer and higher humidity can slow set and extend finishing later into the day.
- Central Valley winters: cold overnight lows can force later start times or rescheduling to keep curing within the plaster manufacturer’s minimum temperature guidance.
Fill, cure, and startup (usually 2–4 days before normal use)
Filling is not the end of the project; it begins the curing and startup period that prevents mottling, scale, and etching. The pool is typically filled continuously, then brushed and balanced on a structured schedule for the first several days.
Startup best practices that affect “swim-ready” timing:
- Continuous fill without stopping at the tile line to reduce ring marks.
- Brush the entire surface (walls, floor, steps) to remove plaster dust as the surface hydrates.
- Water chemistry balancing to protect the new finish from scaling (high calcium/high pH) or etching (low pH/low alkalinity).
Because California regions vary widely in source water hardness, startups often take longer where fill water has high calcium hardness. That’s one reason homeowners sometimes feel the pool “takes longer” even when the physical work is completed on time.
Timeline table: what to expect from drain to swim-ready
This table consolidates the schedule-critical metrics that most directly control completion time. Use it to plan access, inspections, water delivery, and startup labor without guessing.
| Feature / Metric | Specifications | Local Guidelines |
|---|---|---|
| Drain + discharge setup | Coordinate pump-out method, dechlorination if required, and access to sewer cleanout or haul-off | Many CA municipalities restrict storm drain discharge; sewer discharge or haul-off is commonly required depending on city/sewer agency rules |
| Demolition and surface prep | 1–3 days typical; longer for full chip-out, multiple layers, heavy scale, or extensive delamination | Hard-water regions often require additional scale removal steps before bonding and inspection of the shell |
| Repairs + bond coat + resets | Typically 1 day; includes crack treatment, fitting resets, and bond coat timing | If inspections are required for ancillary work (plumbing/electrical), schedule them before finish day to avoid same-day cancellations |
| Interior finish application | Usually 1 day; can extend to 2 with specialty aggregate or weather-related set delays | Coastal humidity and winter temperatures can shift start times and finishing windows |
| Fill + startup | 2–4 days typical for controlled filling, brushing, and chemistry stabilization | Source water hardness varies by region; high-calcium fill water may require tighter chemistry control to prevent scale on new surfaces |
Permits, inspections, and compliance items that commonly affect the calendar
Replastering alone often does not require a building permit, but related scope frequently does, and discharge rules can apply regardless. Any required inspection must be scheduled before the finish coat because fresh plaster is not a practical inspection surface.
Items that can trigger permitting or formal sign-offs:
- Electrical work (light replacements, junction box work, bonding/grounding corrections) typically falls under local electrical permitting and inspection rules.
- Gas line or heater work may require permits depending on the jurisdiction and scope.
- Drain cover and suction safety compliance may need updates if covers are missing, damaged, or incompatible with the sump.
- Water discharge approvals through local sewer agencies or city public works can be required before draining begins.
If you’re comparing project durations between a remodel and new construction, it helps to separate interior finish work from structural/permitting timelines. This overview of how long it takes to build a swimming pool provides context on why excavation, steel, gunite, and inspections make new builds much longer than replaster-only projects.
Finish choice and how it changes scheduling expectations
Material selection changes both installation complexity and startup sensitivity. Standard plaster is typically fastest, while pebble and some quartz systems can add finishing time and require stricter brushing routines early on.
How finish types commonly influence the timeline:
- White plaster: generally the most straightforward application and fastest install day.
- Quartz: similar overall duration but may require additional attention to achieve uniform appearance and texture.
- Pebble/aggregate: can involve additional steps to expose aggregate and refine texture; finishing may extend later or require a return visit depending on system.
Regardless of finish, the “usable pool” date is governed by startup discipline. A technically completed pool that is filled but not balanced can still be at risk of early surface damage.
Owner prep checklist to prevent delays
Homeowners can reduce lost days by preparing access, utilities, and decisions before the drain starts. Most replaster delays come from preventable conflicts: blocked access, unclear scope, or late material selections.
Before day 1, confirm:
- Clear access for crews, hoses, and (if needed) a water truck.
- Dedicated water source and a plan for continuous fill once plaster is complete.
- Equipment shutoff understanding (pump/heater/automation) during drain and startup.
- Finish and color decisions finalized (including tile line and fittings if they are being replaced).
- Pets and safety barriers planned while the pool is empty.
It also helps to understand the basic components of a swimming pool so you can distinguish surface issues from structural or hydraulic problems when reviewing the scope with your contractor.
“Ready to swim” vs. “refilled”: setting realistic expectations
Refilling is a milestone, not the finish line; the surface is still hydrating and can be damaged by poor chemistry or neglected brushing. The most accurate way to plan is to separate the physical construction timeline from the controlled startup timeline.
A practical planning framework:
- Construction complete: after the finish coat is installed and the pool can begin filling.
- Full pool: depends on hose flow rate and pool volume; continuous fill is typically required.
- Swim-ready: after initial brushing and chemistry stabilization, and after any contractor-specified startup milestones are met.
The bottom line: a dependable planning window for California replaster projects
Most homeowners should plan on roughly one week, with 5–10 days covering drain compliance, demolition/prep, one-day finish application, and 2–4 days of startup. The most common add-ons are discharge logistics, hard-water scale removal, specialty finishes, and weather-driven set/curing adjustments.
If you want the shortest path from empty pool to swim-ready water, focus on the schedule levers that actually move dates:
- Lock in discharge method and any required approvals before draining.
- Assume 1–3 days for chip-out and prep if you want a durable bond.
- Protect the plaster day by avoiding overlapping trades and unresolved repairs.
- Commit to a disciplined startup (continuous fill, brushing, and proper balancing) to avoid cosmetic and durability issues that can create rework.
Frequently Asked Questions
Want Your Pool Replaster Done Fast (And Done Right)? Don’t Let One “Small” Misstep Turn Into Weeks of Downtime.
Replastering isn’t just a cosmetic upgrade—it’s a tight, time-sensitive sequence where one wrong call can blow up your schedule and your finish. Draining without the right discharge plan can trigger fines, stop-work orders, or last-minute water-truck scrambling. Cutting corners on chip-out and prep can lead to delamination, hollow spots, and premature failure. Rushing plaster day—or letting weather, humidity, or cold nights dictate the set—can leave you with streaking, mottling, rough trowel marks, or weak curing. And if startup chemistry isn’t controlled from the moment the pool fills, you can permanently etch or scale a brand-new surface before you even take your first swim.
The real risk isn’t just “it takes longer.” The risk is paying twice—once for the replaster, and again to fix preventable bonding issues, surface defects, or startup damage that an experienced local crew plans around from day one.
If you want a clean timeline, a durable bond, and a finish that actually looks the way it’s supposed to look, get a local expert who knows California discharge rules, regional water conditions, and the exact sequencing that keeps replaster projects on track.